Service Manager powered by HEAT
Entering Account Information
•Initially Entering Account Information
•Modifying Account Information
Initially Entering Account Information
Use the Application Setup - Organization Information page to enter basic information about the tenant account. Here is where you set the defaults to use throughout Ivanti Service Manager, including, including your default time zone and currency.
This is one step of the application setup process. For more information about this process, including how to access this page, see Setting Up the Application.
1.Click Your Account. The system displays the Application Setup - Organization Information page.
Application Setup - Organization Information Workspace
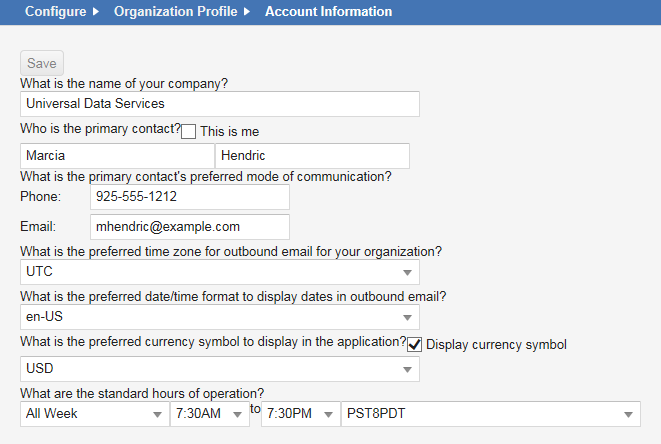
2.Enter information into the fields.
| Field | Description |
|---|---|
|
What is the name of your company? |
The name of the tenant organization. |
|
Who is the primary contact? |
The first and last name (in separate fields) of the primary contact person for this tenant account. Check This is me if you are the primary contact. |
|
What is the primary contact's preferred mode of communication? |
|
|
Phone |
The preferred phone number of the primary contact. |
|
|
The preferred email address of the primary contact. |
|
What is the preferred time zone for outbound email for your organization? |
The time zone for outgoing email. This time zone is the default used in email actions related to the application, such as quick actions. See Working with Dates, Times, and Time Zones. |
|
What is the preferred date/time format to display dates in outbound email? |
The date/time format for outgoing email. This is also the default format used in reports and dashboards. |
|
What is the preferred currency symbol to display in the application? |
The currency symbol to use. You can set a single currency for the tenant. The selected currency appears in the Request Offering and Service Catalog workspaces. Check Display currency symbol to display the currency symbol. |
|
What are the standard hours of operation? |
The hours of operation for the tenant organization. Enter the days, times, and time zone. See also Setting Up Hours of Operation. |
3.Click Next to save your settings and go to the next page. See Adding Customer Information.
Modifying Account Information
1.From the Configuration Console, click Configure > Organizational Profile > Account Information to open the Account Information workspace.
2.Make changes as needed. See Initially Entering Account Information.
3.Click Save.
Was this article useful?
The topic was:
Inaccurate
Incomplete
Not what I expected
Other
Copyright © 2017, Ivanti. All rights reserved.